Sunday, December 24, 2017

Christmas Bread


Christmas Morning would not be complete without the Yummy Dickinson Christmas Bread! Honestly I cannot remember a Christmas morning without it! So today I pulled out the recipe, gathered the supplies, called in Scott my husband to help, and started making our Christmas tradition. Today I used my bread mixer, but most times I knead the bread by hand in honor of my mother and her amazing biceps!  

Below is the recipe I wrote down as my mom walked me through the process 40 plus years ago. The picture below is the day I wanted to make sure that the recipe and tradition lived on as my daughter Lyndsey and I baked the bread together a few years ago.


Dickinson Christmas Bread


  • Add 3 T. (or 1 pkg.) yeast to 1 cup lukewarm water. Stir and let sit to make a sponge.


    • Scald 1 cup milk on medium heat. Remove milk from heat and add 1 stick butter, 1 tsp. salt, 1/2 sugar. Let milk mixture cool to room temperature.

    • Mix yeast, milk mixture and 1 egg together.

    • Mix in approximately 5 1/2 cups flour (1 cup at a time) until the dough pulls from the edges. (You want the dough to be slightly sticky).

    • Knead the dough. Let rise covered in a buttered, covered bowl in a warm area for about an hour.

    • Punch the dough down.

    • Melt 1 stick of butter in a small bowl. Mix sugar and cinnamon in another and set aside.

    • Coat the inside of two bunt pans with butter and then generously sprinkle brown sugar in the bottom. Place red and green pineapple and cherry candies in the bottom forming holly.

    • Roll the dough into small 1” balls. Roll each ball in the melted butter and then the sugar-cinnamon mixture. Place in the pans. Making one row of tightly fitted balls. (If dough remains after filling two pans, simply use the remaining dough to make rolls).

    • Cover the filled bunt pans and let rise for 30 minutes.

    • Cook for 30 minutes at 350 degrees.

    • Remove from oven, dump carefully on a plate and let cool.

    • Drizzle powder sugar glaze over the bread, and you are ready for Christmas Morning.


    Thursday, December 14, 2017

    Theresa's Fruitcake

    Every Christmas my mom, Theresa, would bake and bake and bake! We had so many delicious treats to eat; divinity, fudge, honey candy, sugar cookies, Christmas bread, and of course Fruit Cake!

    One of my favorite baking memories I have of my mom is when she accidentally put Chili Powder in the Fruitcake instead of Cinnamon. Honestly it tasted pretty bad. My Dad, Ed, who was a remarkable, kind, and compassionate man, kept telling my mom, "This fruitcake is delicious, give me another piece!" My mom would take off to get him another piece and he would smile at me and give me a wink! I thought that wink meant, "That fruitcake is terrible!" However I now know that wink meant "I love your little mama." He did love her! In fact one of the last things he told me before he died was buy your mama a dress once in a while and please don't let her get married again. I can't share her.

    So here is my mom's fruitcake recipe as a tribute to a man that loved her so much that he ate her failed batch of fruitcake with love in his eyes. I miss you Daddy.

    Theresa's Fruitcake


    Add 1 1/2 cups raisins in a saucepan and cover with water. Bring to a boil and take off the stove. Set the pan aside as you mix the remaining ingredients.

    Cream together 2 sticks butter, 6 eggs, 11/4 cup sugar,  ½ cup brown sugar and 2 T. Cinnamon.

    Gradually add 2 cups flour, 1 T. baking powder,  ½ t. salt, 1 T. vanilla and 1 tsp. brandy flavoring, and 1 tsp. almond extract.

    Mix in 1 16 oz container of candied fruit (chopped) and 1 8 oz container candied pineapple (chopped). Drain the plumped raisins and add 1 cup pecan halves

    Grease a bread pan (or angel food cake pan)

    .  Bake at 300 for 90 minutes.  Take out of the oven and cover tightly in foil, place back in the oven for 30 more minutes.  Turn off the oven,
     and let the cake stay in the oven until the cake has completely cooled. *Don't open the oven!

    Monday, October 2, 2017

    Scalloped Potatoes

    I love my mom's Scalloped Potatoes that she put in the skillet and then baked in the oven. Of course, she had the heavy duty stainless steel pans they had back in the day, I cook mine in a rectangular baking dish, or "dripper" as my mom called them.

    To make the dish, chop up an onion (the amount you would like because I was taught by my mom to never measure), and place in a pan with about 2 T. of butter. Stir and cook over moderate heat until the onions turn clear. Wisk into the mixture, about 3 T. of flour until it is well mixed without any lumps. Add to this mixture about 3 ½ cups of milk. Simmer the mixture and prepare the potatoes.

    While the sauce is simmering, peel about 4 large potatoes or more if they are small. Slice the potatoes very thinly! Butter the bottom of your baking dish and layer the bottom with the first layer of potatoes. Cover that layer with some of the sauce mixture. Continue the layering process leaving the top layer as sauce. Cut ½ cube of butter into bits and place around the top of the mixture.

    Cover the baking sheet with foil. Bake at 375 degrees for about 20 minutes. Take off the foil and bake for another 20 minutes or until the potatoes are tender and golden (press a fork into the potatoes to check tenderness).

    *You can grate cheese and add to the top if you like the last 5 minutes of baking.


    When my mom wasn't baking she could be found cleaning, canning, doing embrodry, sewing,  quilting, or painting. I never saw my mother sit still much except to read the daily paper or watch our nightly dose of "Perry Mason" on late night TV (during my sleep deprived teen years).  She did get hooked on the show Dallas, but I doubt she would ever admit it!

    This beautiful painting, I believe, is in the possession of her son Ellis or Ed as her prefers to be called. It is a rendition of Horseshoe Mountain, a favorite spot for all us North Sanpete folk.

    SaveSave

    Thursday, September 28, 2017

    Mom's Pot Roast

    This is a picture of my Aunt Effie Hansen VanBuren, known as "Aunt Faye." Because my maternal grandmother died almost a decade before I was born, my mother's oldest sister "Faye" filled the slot of grandmother for me. I truly loved spending time at her house, playing on her pump organ,  swinging on that tire swing, and admiring her pansies.  I also loved  having her come and visit us at our house in Chester.

    She was always so thoughtful and kind to me, even making it a point to make it to my high school graduation to hear my speech. Sadly she died only a month before my wedding, this broke my heart because I wanted her to be a part of that day.

    I love this picture of her cooking in her kitchen in Manti. I wonder what is hidden under the lids of the pots? Perhaps Delicious Pot Roast?

    Theresa's Pot Roast

    1 Beef Roast
    2-3 cups water
    1 onion cut into cubes or strips
    1 chopped celery stalk
    2 beef bullion cubes
    3 T. butter
    Salt and pepper to taste

    Put the roast in a covered pot (just like Aunt Faye's) and bring to a boil. Turn heat to a medium simmer for about an hour.

    Mix into a paste: 3 T. flour into 1/4 cup water. Add this mixture to the pot and stir it in. (This will make a gravy base to the pot roast).

    Add to the pot cubed potatoes and carrots; cook until the vegetables are tender and the meat is cooked as desired (apx. 45-60 minutes). While the Pot roast is cooking, add water as needed.

    When serving strain all of the cooking juices for a yummy gravy. Thicken with more flour if necessary.


    SaveSave

    Monday, September 4, 2017

    The Best Home Canned Peaches Recipe

    Why are your peaches so much better than my mom's? That is the question friends of my children would ask when they had some of the yummy golden delights.

    I had two secrets. The beautiful organic peach trees in my garden and Theresa's "How To Can Peaches" recipe. I loved canning peaches with my mom, it was a yearly date to can peaches together each September. ( I miss those times).
    Today Scott and I canned 42 quarts in our new canning kitchen.

    Here are the step-by-step directions.
    Sanitize the jars in the dishwasher.

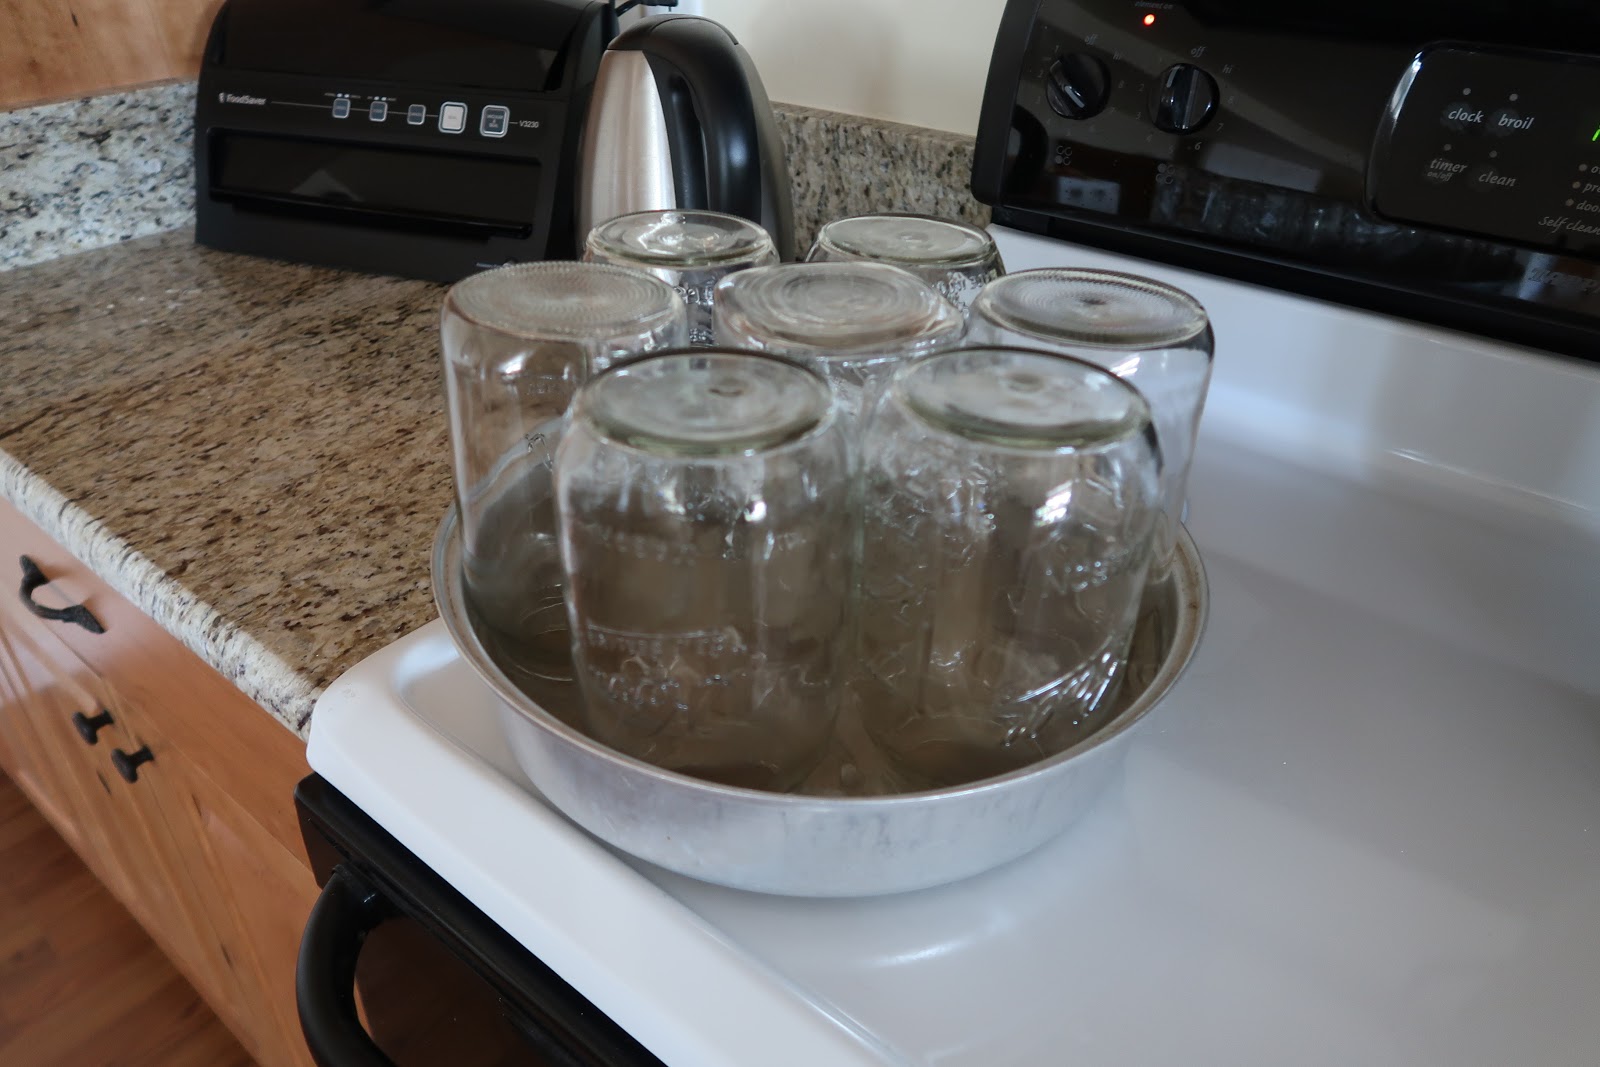
    Put seven of those jars facedown in a shallow pan of water and boil for about 5 minutes.

    Start a pot of water boiling that will be used to dip the peaches in for easy pealing. Turn heat to med. after water boils.

    Take the jars from the boiling water and add 1/4 cup sugar to each. (You can add more if you like sweeter peaches).

    Heat water and add just above the sugar in each jar and stir.
    Stir the sugar water until the sugar is dissolved.

    Wash the peaches.


    Add the washed peaches to the water and set timer for 3 minutes.

    Turn the heat off of the pan used to heat bottles but keep on burner. Add the seven lids and rings.
    After 3 minutes in the hot water, remove peaches and run under cold water.

    Cut the peach in half, and the skin will slide right off.

    Fill the jars with peaches.


    When jars are full, add hot water to the peaches to fill the jar, leaving ½ inch headspace.

    Wipe the top of the jar to remove any residue.
    Place a lid on each jar.
    Tighten the rings.
    Place the jars in the water bath canner.
    Fill the canner with water until the water touches above your fingernail. 

    Turn the heat onto high on your stove. *We love to use our gas camping stove so that we can do two pots at a time and keep heat and mess outside. 

    When the water begins to boil, turn the head to med. high and time for  40 minutes. (This is for my altitude, check the internet for your boiling time.

    Remove the bottles from the water bath.


    Place the peaches to cool undisturbed for 24 hours. Then check that all are sealed, remove rings if you wish and put in your pantry.
    Carolyn, Theresa, Kathy, Aunt Faye, Sheila

    Thank you mom for teaching me how to can! Your method makes delicious fresh tasting peaches that are not ruined with heavy syrup.

    Tuesday, July 18, 2017

    Cowboy Cookies


    I loved when my mom made my favorite cookies. I have no idea why she called them cowboy cookies, but they were delicious! Still today when I think of them I smell that delicious waft in the air. In fact, I think I might whip up a batch right now just for the smell alone.

    Theresa's Cowboy Cookies


    2 c. flour
    1 t. soda
    ½ t. salt
    ½ t. baking powder
    1 c. shortening
    1 c. sugar
    1 c. brown sugar
    2 eggs
    2 c. oats
    1 t. vanilla.

    Sift together and set aside the flour, soda,  salt, and baking powder. Blend together the shortening, sugar, and eggs. Beat until light and fluffy. Add the flour a cup at a time and mix well. Add the rolled oats and vanilla. Drop by teaspoon on cookie sheet. Bake at 350 degrees for 8-10 minutes.

    *Note: If you are like me and don't want to run to the store to find the shortening, you can substitute 1 cup shortening for 1 cup + 2 T. of butter. It works and the cookies are still yummy, but not perfectly Theresa.
    I love this picture of Theresa and her best friend Grace showing a little leg in the 1930's. Pretty racy mom!


    Monday, July 17, 2017

    Vanilla Ice Cream

    Summertime just wasn't complete without some delicious homemade Vanilla Ice Cream. It was so much fun to gather in the evening and take our turn at the crank. We would play games like Annie Eye Over as we called it, play a little tether ball, or laugh hysterically as we played The Bishop's Cat. It was great time spent together with my mom and siblings. My dad would appear from the milk barn just as the delicious treat was ready.

    Theresa's Vanilla Ice Cream

    Makes 1 ½ Quart

    1 Quart Half and Half Milk (of course living on a farm we just skimmed cream from the milk tank)
    1 T. Vanilla
    3/4 cup sugar
    ½ t. salt

    Mix ingredients together and fill can 2/3 full. Put center cap on can rest. Pack ice and salt around the inner can. Pour 1 cup cold water on the ice and salt. Add more as it settles to completely cover.

    Crank the ice cream maker for about 30 minutes to 1 hour,  checking consistency. Or, you might want to get this new fangled ice cream maker from amazon then everyone can play the games while you let the motor do the cranking!


    Theresa and Ed on one of their many Saturday rides.